

There's something about a kitchen table covered in Christmas cookies that makes the whole season feel sweeter. Whether this is your very first year with a piping bag or you've been decorating for a while, we put together our favorite Christmas cookie decorating ideas, sorted by skill level, so you can find a design that feels just right for you.
Every idea below uses a real cutter from our Christmas collection, so you can see the shape we had in mind. You can browse all of our Christmas sets in one place on our Christmas page.
Beginner Christmas cookie ideas
If you're just getting started, choose shapes with simple outlines and big open areas. One or two colors of royal icing and a few dots or lines are all you need for a cookie that looks lovely on a platter.
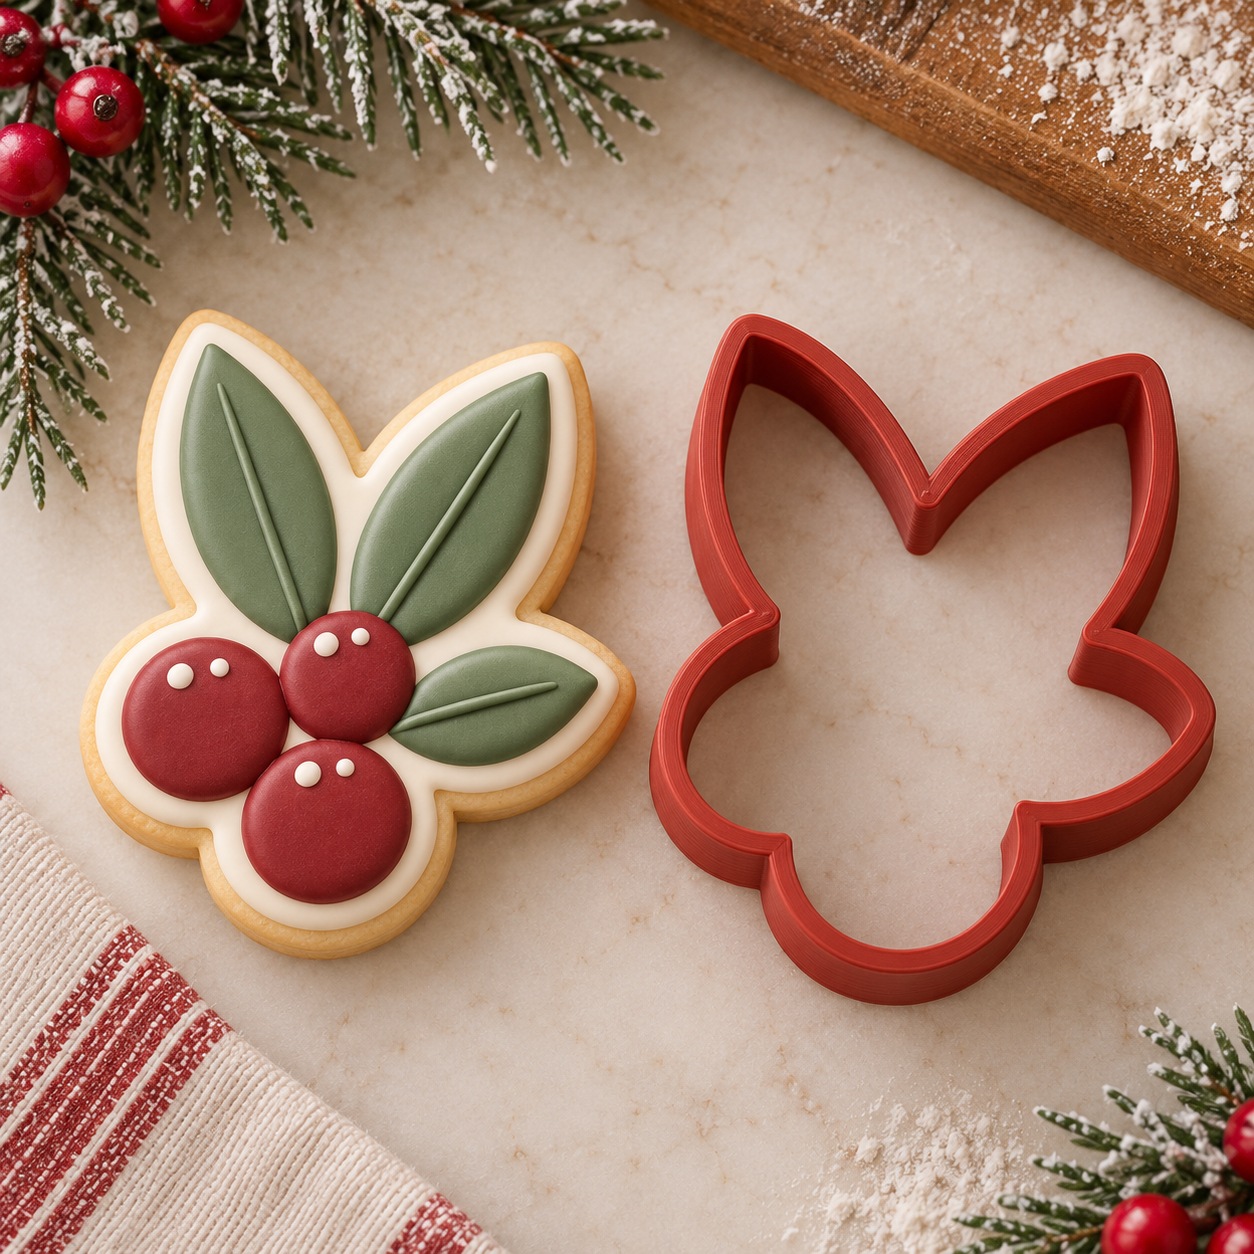
Mistletoe with three red berries
The Mistletoe Cookie Cutter is one of the friendliest shapes for a new decorator. Flood each leaf in sage green, let it set, then add three round red berries with a thicker icing. A thin piped line down the middle of each leaf gives it a finished look without any tricky detail.
Classic dotted Christmas tree
A green tree with colorful dots is a holiday classic for a reason. Flood the Christmas Tree Cookie Cutter in green and, while the icing is still wet, drop in little dots of red and white. They settle flat into the base (this is called wet-on-wet), so you get a smooth, polished cookie with almost no effort. Finish with a brown trunk.
Simple candy cane stripes
The Candy Cane Cookie Cutter from our Christmas Cookie Cutter Set is perfect practice for piping straight lines. Flood it white, let it crust over, then pipe red diagonal stripes across it. If a stripe wobbles, just call it handmade charm.
All-white snow tree
Want something elegant with only one color? The Snow Tree Cookie Cutter looks beautiful in white and cream. Outline each tier, flood it, and add a little piped scallop along the bottom edge of each tier for snow.
Intermediate Christmas cookie ideas
Once you're comfortable outlining and flooding, try designs that use layers. That means letting one section dry before piping the next one on top, which gives your cookies dimension and texture.
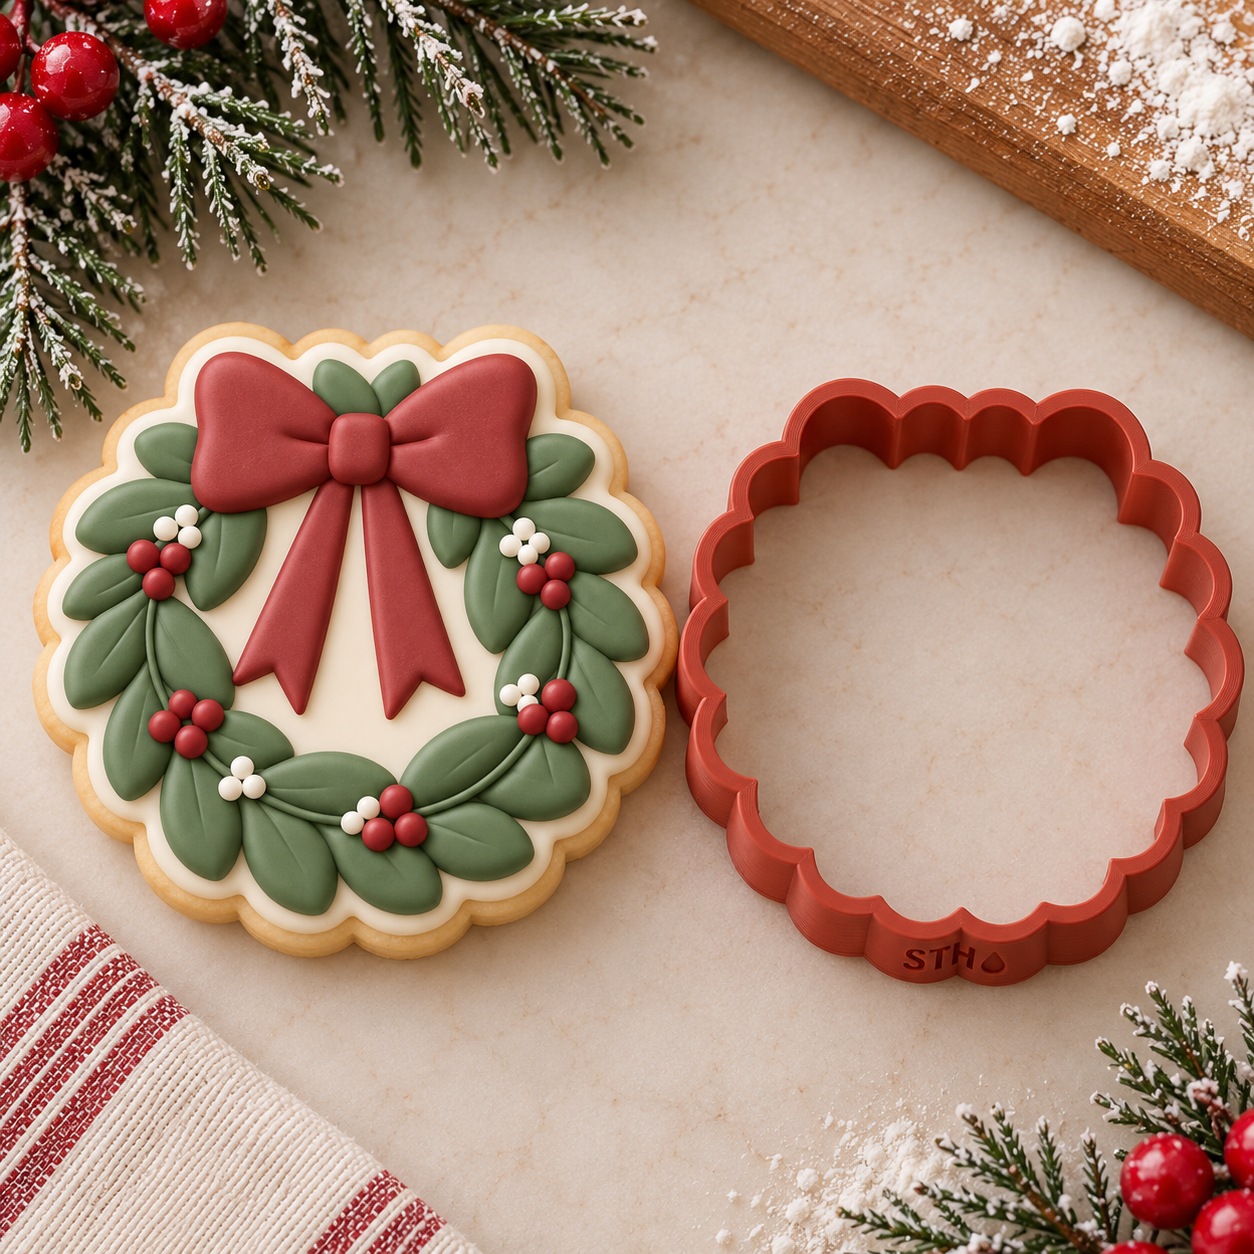
Bow wreath
The Wreath Cookie Cutter from Merry and Bright is a wonderful layering project. Flood the ring in cream, then pipe small leaves all the way around in two shades of green. Tuck in red and white berry dots, and once everything has set, pipe a big red bow on top so it sits up off the cookie.
Snowy gingerbread house
Flood the Gingerbread House Cookie Cutter in a warm brown, let it dry, then pipe a thick white roof line, windows and an arched door. A tiny wreath on the door and a few sprigs of holly make it feel cozy.
Cozy Christmas sweater
The Sweater Cookie Cutter is a perfect place to practice patterns. Pipe a ribbed collar and cuffs, then add rows of zigzags, little trees or snowflakes across the front. Keeping to two or three colors keeps it looking classic.
Candy cane heart
The Candy Cane Heart Cookie Cutter shows two candy canes curving into a heart. Flood each cane in white, let them dry, then add red peppermint stripes. It's a sweet way to practice working in separate sections.
Ideas for confident decorators
If you love a detailed cookie and have time to let each layer dry, these designs will make your cookie platter the star of the party.
Striped vintage ornament
The Pointed Ornament Cookie Cutter is made for bold, curved panels. Flood every other panel in red and cream, let them dry, then fill in the rest so the lines stay crisp. Finish with a sage leaf down the center, a few holly berries and a gold cap.
Leaping deer in a knit scarf
The Deer Cookie Cutter is all about texture. Flood the body in tan, add white spots wet-on-wet, then pipe a red scarf with little knit lines once the base has crusted. Brown antlers and a touch of pink on the cheek bring it to life.
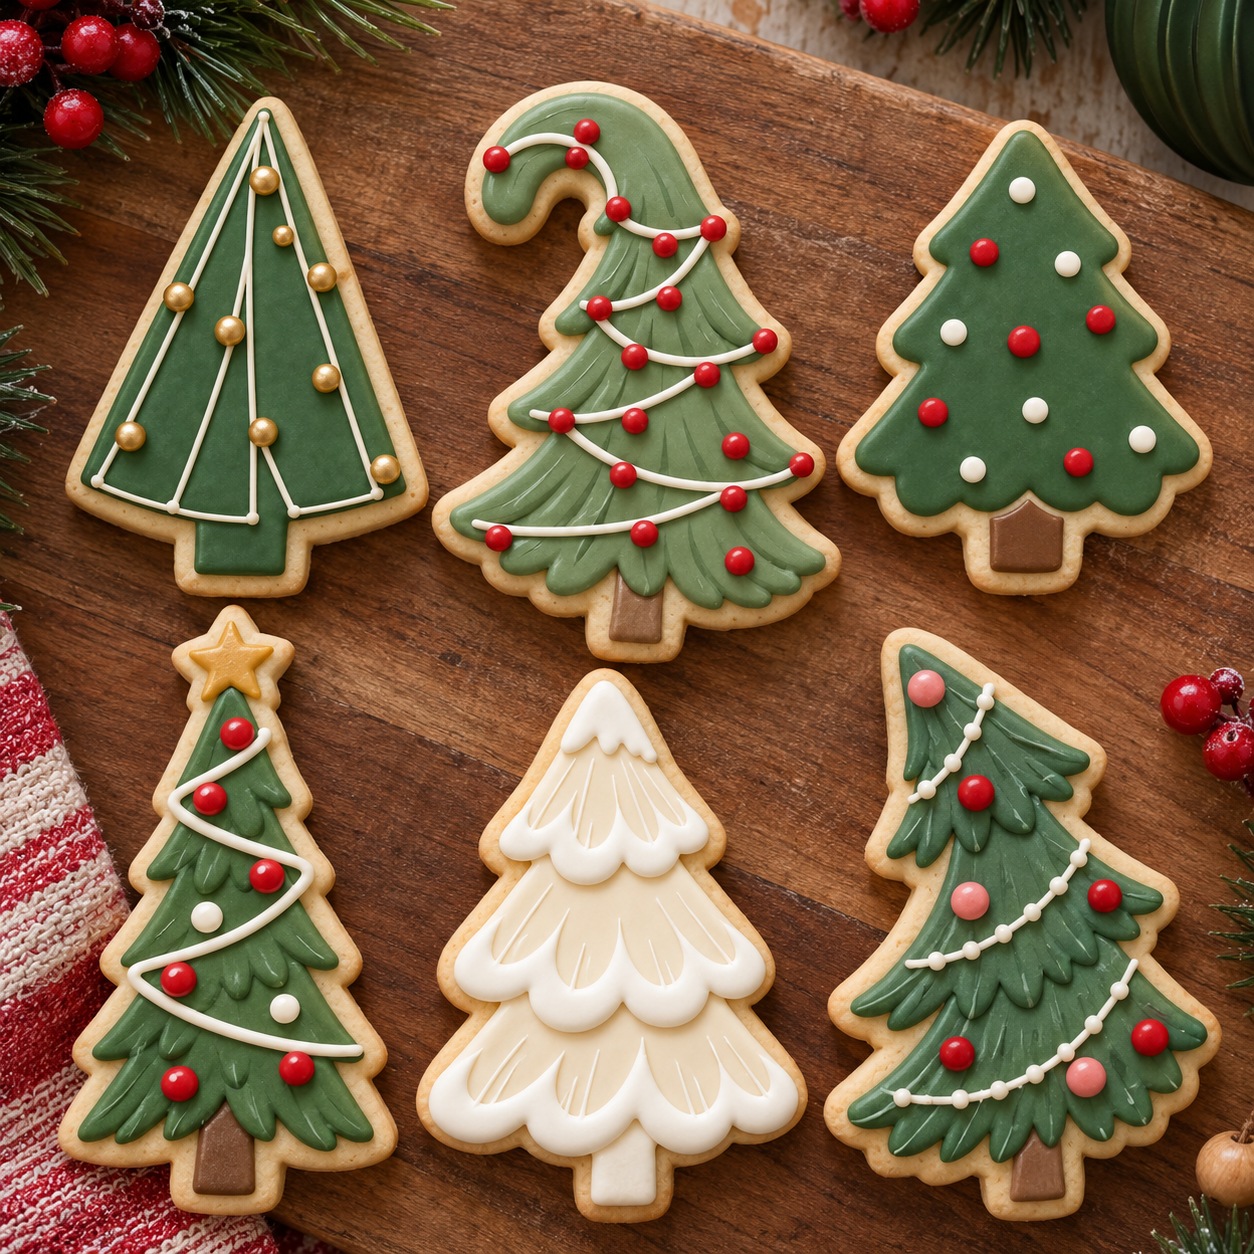
A Christmas tree forest
For a showstopper platter, decorate all six trees in the Christmas Tree Cookie Cutter Set in a different style. Try piped garland on the Skinny Tree, gold pearl ornaments on the Triangle Tree, a curled top on the Drooped Tree and textured branches on the Leaning Tree. Side by side, they look like a little snowy forest.
A Christmas baby shower platter
Celebrating a little one on the way this season? Our A Little Merry set brings together a Teddy Bear in a piped knit scarf, a vintage Rocking Horse, a Christmas Rattle, a Christmas Carriage and a Jolly Onesie. Soft pinks, sage and cream next to Christmas red make the whole set feel gentle and festive.
Royal icing tips for Christmas cookies
A few small habits make a big difference, whatever your skill level.
Get your icing consistency right
- Outline or piping icing should be about as thick as toothpaste. It holds its shape and stops your flood from running over the edge.
- Flood icing should be thinner, so a line drawn through the surface smooths back in after about 10 to 15 seconds.
- Add water just a few drops at a time. It's much easier to thin icing than to thicken it again.
- Keep your bowls covered with a damp towel or plastic wrap, since royal icing crusts quickly when it's left out.
Give it time to dry
- Let a flooded base crust for about an hour before piping details on top, so the layers don't sink into each other.
- Plan on letting decorated cookies dry for at least 8 to 12 hours, or overnight, before you stack, bag or box them.
- Humid days slow drying down, so give your cookies extra time. A small fan in the room can help.
Plan your colors ahead
- Choose a palette of three to five colors before you start. A limited palette makes a whole platter look like it belongs together.
- Mix deep reds and greens ahead of time if you can. They darken as they sit, so mix them a shade lighter than you want.
- Make a little more of each color than you think you'll need, because matching a shade later is tricky.
- Chill your cut-out dough before baking so your shapes keep their crisp edges.
When the decorating is done, wash your cutters by hand in cool or lukewarm water with a little mild soap, then dry them right away. They'll be ready for next year's baking.
Rather leave the decorating to us?
If you'd love a platter of hand-decorated Christmas cookies without the piping bag, we make custom sugar cookies for holiday parties, teacher gifts and family gatherings. We'd love to hear what you're celebrating.
However you decorate this year, we hope your kitchen is full of sweet moments. Merry Christmas from our little Fort Worth shop!